
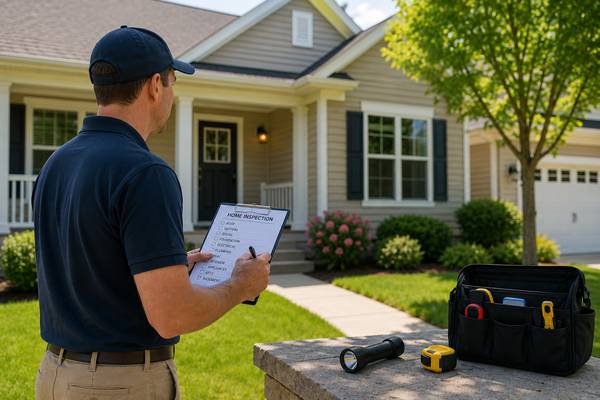
Selling a home is exciting — but the home inspection can feel like the most nerve‑wracking part of the process. You’ve accepted an offer, the paperwork is moving forward, and now a stranger will spend hours examining every corner of your property. It’s natural to feel anxious. But with the right preparation and mindset, the inspection doesn’t have to be stressful. In fact, it can be an opportunity to show how well you’ve cared for your home and to move one step closer to closing day with confidence.
Understanding What a Home Inspection Really Is
A home inspection isn’t a test you pass or fail. It’s a professional evaluation of your home’s condition — a snapshot of how things look and function at the time of sale. Inspectors check the structure, systems, and safety features: roof, foundation, plumbing, electrical, HVAC, and more. Their job is to identify potential issues, not to assign blame or negotiate repairs.
Buyers use the inspection report to make informed decisions, and sellers can use it to demonstrate transparency. When you understand that the inspection is about information, not judgment, the stress begins to fade. It’s simply part of the process — one that protects both sides.
Step 1: Start With a Clean Slate
A clean home sets the tone. It tells the inspector — and the buyer — that you’ve maintained your property with care. You don’t need to deep‑clean every inch, but tidy spaces make it easier for the inspector to access what they need.
- Declutter hallways and utility areas. Move boxes, furniture, and stored items away from walls and systems.
- Clear access points. Inspectors need to reach the attic, basement, electrical panel, furnace, and water heater. Make sure nothing blocks these areas.
- Replace burned‑out bulbs. It’s a small detail, but it prevents confusion about whether a fixture is broken or just missing a bulb.
- Empty the sink and dishwasher. A clean kitchen helps the inspector test water flow and drainage without obstacles.
Think of it as setting the stage for a smooth performance. The easier you make their job, the faster and more positive the inspection will feel.
Step 2: Handle Minor Repairs Ahead of Time
You don’t need to renovate your home before inspection day, but addressing small issues can make a big difference. Loose doorknobs, dripping faucets, cracked caulk, or missing outlet covers are easy fixes that show pride of ownership.
Walk through your home with a critical eye — or better yet, with your agent. They can help you spot items that might raise red flags. Common pre‑inspection touch‑ups include:
- Tightening cabinet handles and hinges
- Replacing air filters in HVAC systems
- Cleaning gutters and downspouts
- Testing smoke and carbon monoxide detectors
- Repairing minor leaks under sinks
- Sealing gaps around windows and doors
These small efforts can prevent some easily fixed items to a long list of “minor deficiencies” in the report and reassure buyers that the home has been well cared for.
Step 3: Gather Documentation
Inspectors love documentation — and buyers do too. Having records ready shows transparency and organization. Collect receipts, warranties, and service records for major systems and recent repairs.
Include:
- Roof replacement or repair invoices
- HVAC service logs
- Pest control treatments
- Appliance warranties
- Permits for renovations or additions
Place them in a folder or binder labeled “Home Maintenance Records.” When the inspector asks about the age of your roof or furnace, you’ll have the answer ready. It’s a simple gesture that builds trust and reduces uncertainty.
Step 4: Check Utilities and Systems
Before the inspection, make sure all utilities are on — even if the home is vacant. Inspectors need to test electrical outlets, plumbing fixtures, heating, and cooling systems.
- Turn on the water supply and pilot lights.
- Ensure the thermostat works properly.
- Run the garbage disposal and exhaust fans.
- Test garage door openers and remotes.
If something doesn’t function, fix it or leave a note explaining the situation. For example, “The downstairs bathroom fan is scheduled for replacement next week.” Clear communication prevents misunderstandings and keeps the report accurate.
Step 5: Prepare the Exterior
Curb appeal matters — even during an inspection. The outside of your home tells a story about maintenance and care.
- Trim bushes and trees away from the roof and siding.
- Clean debris from around the foundation.
- Check that downspouts direct water away from the house.
- Make sure exterior lights and locks work.
- Inspect decks, railings, and steps for stability.
If you have a pool, spa, or sprinkler system, ensure they’re operational and safe. A well‑kept exterior signals that the home has been consistently maintained, which can influence how the inspector — and buyer — perceives the overall condition.
Step 6: Plan for Pets and People
On inspection day, it’s best to give the inspector space to work. If possible, take pets with you or secure them in a comfortable area. Dogs barking or cats darting underfoot can distract the inspector and add unnecessary tension.
In many transactions, sellers arrange to be away from the property during the inspection so the inspector and buyer can move through the home comfortably. Your agent can advise you on what is customary in your market. But if you stay, be courteous and avoid hovering. Inspectors appreciate quiet, uninterrupted time to focus. If they have questions, they’ll ask.
A calm environment helps everyone stay focused and keeps the process professional.
Step 7: Timing and Access
Inspections typically take two to four hours, depending on the size and condition of the home. Make sure the inspector can access every area — including locked rooms, sheds, and garages.
If you have security systems or smart locks, provide temporary codes or instructions. Leave keys for gates or outbuildings in a visible spot. The goal is to eliminate obstacles that could delay or complicate the inspection.
Step 8: Adopt the Right Mindset
Perhaps the most important preparation isn’t physical — it’s mental. Many sellers fear the inspection because they imagine worst‑case scenarios. But remember: every home has imperfections. The inspector’s job is to document, not to judge.
Approach the process with openness. If issues arise, they can often be negotiated or repaired. Your agent will guide you through next steps, whether that means offering credits, scheduling repairs, or simply clarifying misunderstandings.
Stress comes from uncertainty — and preparation replaces uncertainty with confidence.
Step 9: Communicate With Your Agent
Your real estate agent is your ally. They’ve guided countless clients through inspections and know what to expect. Discuss your concerns ahead of time:
- What are common issues inspectors find in homes like yours?
- Should you repair or disclose certain items before inspection?
- How should you respond if the report lists unexpected problems?
Your agent can help you interpret the results and keep negotiations balanced. Their experience turns what feels like a stressful hurdle into a manageable step toward closing. I’ve had numerous clients come to me pre-inspection and simply say, “I just need the reassurance that everything will be okay”. Part of our role as real estate professionals is helping sellers navigate the emotional side of having someone they don’t know thoroughly inspect a home they may have lived in and cared for for years.
Step 10: The Day of the Inspection
On the big day, do a quick walkthrough before the inspector arrives:
- Open blinds and curtains for natural light.
- Unlock all doors and gates.
- Turn on lights in dark areas.
- Make sure sinks and toilets are clean and functional.
- Provide any necessary instructions for accessing smart-home features.
Then, step back and let the process unfold. The inspector will take photos, notes, and measurements. They may test appliances, check outlets, and climb into the attic. It’s all routine.
When they’re finished, they’ll compile a detailed report. This usually is completed within 24 to 48 hours, but it can vary depending on the inspector. Your agent will review it with you and discuss next steps.
Step 11: After the Inspection — Keep Perspective
Once the report arrives, take a deep breath. It’s not unusual to see a long list of findings — even brand‑new homes have them. Focus on what truly matters: safety, structure, and major systems.
Cosmetic issues or minor wear‑and‑tear are part of homeownership. Don’t let them derail your confidence. Work with your agent to prioritize repairs or negotiate solutions.
Remember, the inspection isn’t a verdict — it’s a conversation starter. It helps both parties move forward with clarity and fairness.
Preparing for a home inspection doesn’t have to be stressful. It’s about organization, communication, and mindset. When you clean, address minor maintenance issues, organize your records, and know what to expect, the inspection becomes much easier to manage.
You’re not just selling a house — you’re presenting a home that’s been loved and maintained. That confidence shows, and buyers feel it.